1. Install the Software
Important Note:
This software uses VMProtect for code protection and may be mistakenly flagged as suspicious by antivirus software. This is normal, and you need to add the software to the antivirus whitelist. Click here for specific setup instructions
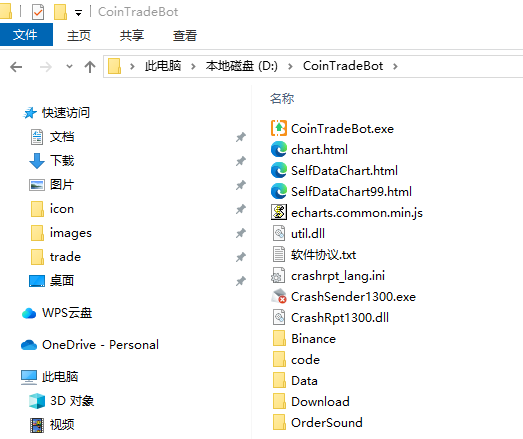
1.1 Portable Version (Unzip to Use)
- Download CoinTradeBot.zip
- Unzip to any directory
- Run CoinTradeBot.exe

1.2 Installer Version
- Download CoinTradeBotSetup.exe
- Double-click to run the installer
- Follow the prompts to complete the installation
- Launch from the start menu or desktop

2. New User Registration
To register a new user, please follow these steps:

Step 1: After running the software, click on Try

Step 2: Enter your email and obtain the verification code

Step 3: Create a user and log into the software
Registration Steps Instructions:
- Enter your email address and click "Send" to get the verification code
- Check your inbox or spam folder for the verification code
- Enter the verification code, username, and password to complete registration
- Log into the software using your registered username and password
3. API Configuration
3.1 Create API Key
Steps to create an API key on Binance:
- Click on the profile icon in the top right corner to enter the "User Center"
- Find and click "API Management" in the left menu
- Click the "Create API" button

Find API Management in the User Center

API Management Interface

API Permission Settings
Key Points for API Permission Settings:
- You must check "Enable Spot and Margin Trading"
- Please do not check other permissions (withdrawal, transfer, etc.)
- It is recommended to choose "No Restrictions (Safer)" for IP restrictions
- Please keep your API Key and Secret Key secure
3.2 Software Configuration
Steps to configure the API in the software:
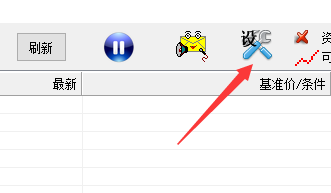
- Click the "Settings" button on the toolbar
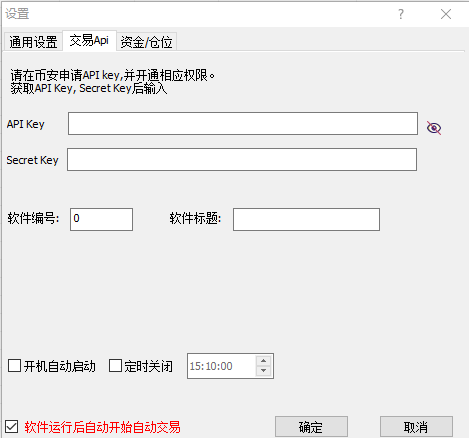
- Select the "Trading API" tab in the pop-up window
- Enter the API Key and Secret Key
- Set the relevant software parameters
- Click "OK" to save the settings
🔒 Security Commitment:
- Your API key is only encrypted and stored locally, and will never be transmitted over the network
- All trades communicate directly with Binance servers from your machine
- The software does not collect or upload your API key information
- It is recommended to regularly check the usage of your API key on the Binance official website

Click the "Settings" button on the toolbar

API configuration window
Software Setup Instructions:
- API Key and Secret Key need to be obtained from Binance
- The software ID and identifier are used to distinguish different instances when running multiple copies
- You can choose whether to start automatically on boot and to shut down at scheduled times
- "Automatically start trading after software launch" means trading will begin immediately after startup
4. Start Trading
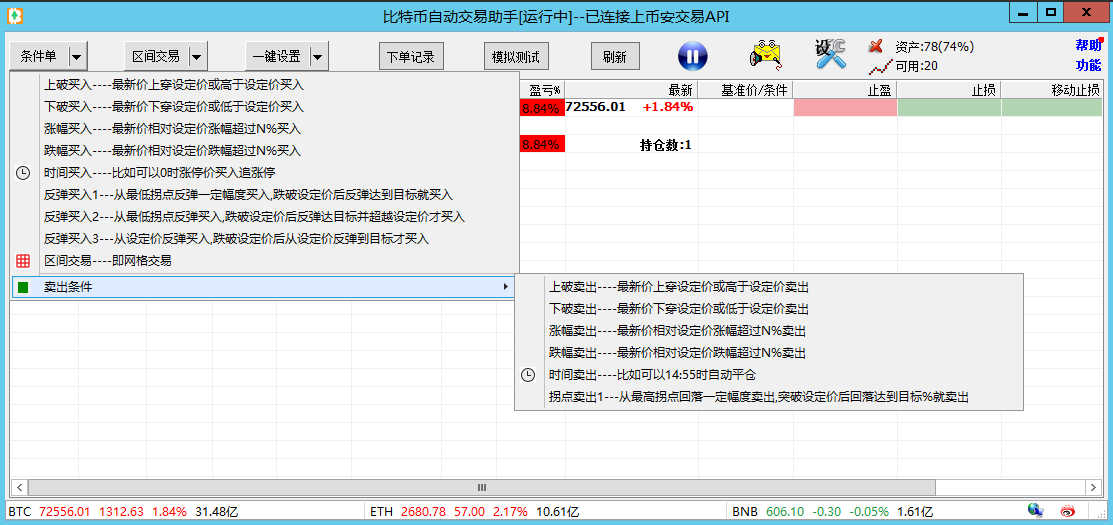
4.1 Basic Interface Explanation

- Function Button Area
- Conditional Trading/Range Trading: Select trading mode
- One-click Setup: Quickly set trading conditions
- Order History: View historical trades
- Refresh/Pause: Control trading status
- Trading Conditions Area
- Buy Conditions: Breakout, breakdown, price increase, price decrease, time, rebound buy, etc.
- Sell Conditions: Breakout, breakdown, price increase, price decrease, time, sell at target, etc.
- Status Display Area
- Current price and price change
- Account asset status
- Trade execution status
4.2 Create the First Trade (Example: Breakout Buy)
- Select Trading Conditions
- Click the dropdown arrow next to the "Conditional Trading" button on the main toolbar
- Select "Breakout Buy" from the popup menu
- Set Trading Parameters
- In the condition settings window, select the trading pair (e.g., BTC) from the dropdown menu in the upper left corner
- Set the breakout price: enter the target price
- Set the buy quantity: enter the amount to purchase
- Optional: Check "Do not buy above" to avoid chasing highs
- Optional: Set a limit on the number of buys
- Confirm and Start
- Check if the parameter settings are correct
- Click "OK" to save the conditions
- Ensure the start button on the main interface (blue play button) is in the running state


Breakout Buy Explanation:
- When the price crosses above the set price or exceeds it, a buy will be triggered
- The "Do not buy above" option can help avoid chasing highs
- You can set a limit on the number of buys to control repeated purchases
- Once trading is started, the system will automatically execute trades based on the set conditions
Notes:
- It is recommended to test with a small amount for the first trade
- Ensure that a reasonable stop-loss price is set
- Check if API permissions are correct before starting trading
5. Other Settings
5.1 Security Recommendations
Capital Management Recommendations:
- Set a reasonable amount for each trade
- Set stop-loss to protect capital
- Regularly check API permission settings
- Do not share your API key
5.2 System Settings
Antivirus Whitelist Settings
Since the software uses VMProtect for code protection, mainstream antivirus software may falsely flag it. Below are the methods for adding whitelists for common antivirus software:
Windows Defender
- Open Windows Security Center
- Click on "Virus & threat protection"
- In "Virus & threat protection settings", click "Manage settings"
- Find "Exclusions" and click "Add or remove exclusions"
- Select the software installation directory or program file
360 Security Guard
- Open 360 Security Guard
- Click on "Virus Scan"
- Click "Settings" in the top right corner
- Select "Trusted Zone"
- Click "Add trusted file" and select the program file
Huorong Security
- Open Huorong Security Software
- Click on "Security Settings"
- Select "Trusted List"
- Click "Add Trust" and select the program file
Notes:
- Ensure the software added to the whitelist is downloaded from official channels
- It is recommended to add the entire software directory to the whitelist
- If you encounter special circumstances, contact technical support for assistance
Other System Settings
- Configure system proxy settings (if necessary)
- Check if the system time is accurate
- Ensure the network connection is stable
- Adjust system power settings to prevent automatic sleep